
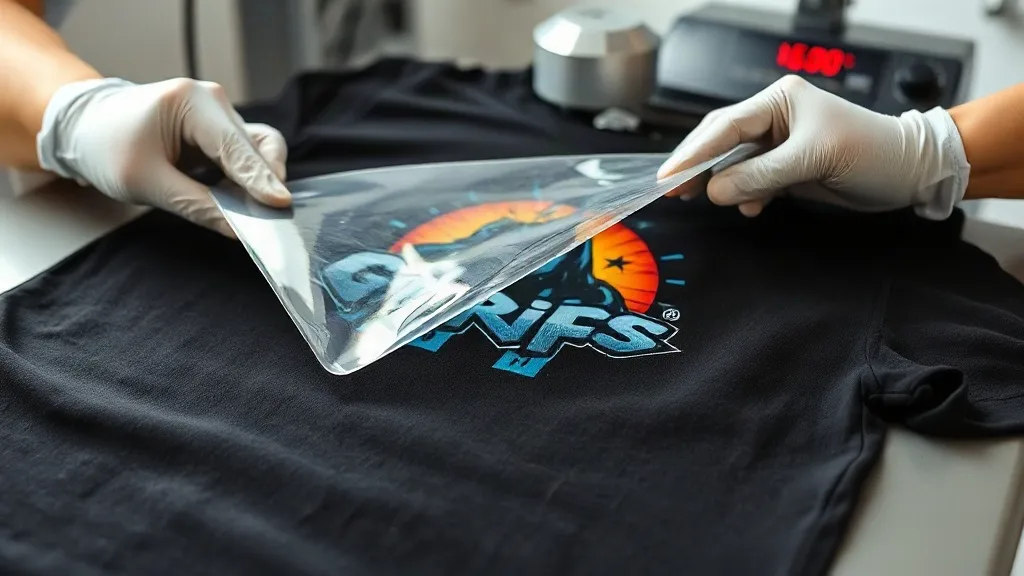
You've dialed in your press temperature, applied consistent pressure, and timed the press to the second. The garment looks perfect as you pull it from the platen. Then you peel the film, and your heart sinks: half the design stays on the carrier sheet, or the edges lift, or the whole thing looks cloudy. The peel is the moment of truth for DTF transfers, and it's where many promising prints fail. Unlike other heat transfer methods, DTF relies on a delicate balance of heat, pressure, and timing to transfer a thermoplastic powder adhesive from film to fabric. The peel stage is not just about removing the carrier; it's about ensuring the adhesive has fully bonded while the film is still at the right temperature. Get it wrong, and you'll see cracking, peeling, or a dull finish that won't survive the first wash. In this guide, we'll break down the science of peeling, the difference between hot and cold peel, and the variables that make or break your transfer. Whether you're a beginner or a seasoned pro, understanding the peel will help you achieve consistent, durable results.
Why the Peel Matters More Than You Think
The peel is the final step in the DTF transfer process, but it's also the most revealing. When you press a DTF transfer, the adhesive powder melts and penetrates the fabric fibers. The carrier film holds the design in place until the adhesive cools and sets. If you peel too early, the adhesive is still molten and can stretch or separate. If you peel too late, the adhesive may have cooled too much and bonded to the film instead of the fabric. The result is a print that looks fine initially but fails after washing. The peel also affects the hand feel. A proper peel leaves a smooth, flexible print that moves with the fabric. A poor peel can leave a stiff, plastic-like layer that cracks when stretched. Understanding the peel is essential for anyone serious about DTF transfers.
The Role of Temperature in Peeling
Temperature is the biggest factor in a successful peel. Most DTF transfers are designed for a hot peel, meaning you remove the film immediately after pressing while the adhesive is still warm. The ideal temperature range for peeling is typically between 140°C and 160°C (284°F to 320°F), but this varies by film manufacturer. If the transfer is too hot, the adhesive may be too fluid and stringy, leading to a messy peel. If it's too cool, the adhesive may have already set and will stick to the film. A quick test: lift one corner of the film. If it releases easily without resistance, you're in the sweet spot. If it feels tacky or resists, wait a few seconds and try again. For cold peel transfers, you must wait until the film is completely cool to the touch, which can take several minutes. Cold peel is less common but can be useful for delicate fabrics or complex designs.
Timing: The Window of Opportunity
Timing is closely tied to temperature. The moment you open the press, the clock starts ticking. For hot peel, you have a window of about 5 to 10 seconds to begin peeling. This window shrinks in a cold shop or if the garment is thin. If you're working in a production environment, you need to develop a rhythm: press, open, peel, and move on. For cold peel, patience is key. Rushing a cold peel is a common mistake that leads to adhesive transfer. Use a timer to ensure you wait the full recommended time, usually 2 to 5 minutes. In humid conditions, the cooling process may take longer, so adjust accordingly.
Hot Peel vs. Cold Peel: Which One Should You Use?
The choice between hot and cold peel depends on your film, your fabric, and your workflow. Hot peel is faster and more common in high-volume shops because it allows you to handle the garment sooner. However, hot peel requires precise timing and can be less forgiving on stretchy fabrics. Cold peel is more forgiving and often yields a smoother finish, but it slows down production. Some films are designed specifically for hot peel, while others require cold peel. Always check the manufacturer's recommendations. If you're using a film that supports both, experiment to see which gives you better results for your specific applications.
When Hot Peel Works Best
Hot peel is ideal for standard cotton and poly-cotton blends, especially when you need to move quickly. It works well for simple designs without fine details. However, hot peel can be tricky on dark garments because the adhesive is more visible if not fully transferred. It also requires a consistent press temperature; fluctuations can ruin the peel. If you're doing a lot of small logos or left-chest prints, hot peel can save time, but you must be precise.
When Cold Peel Saves the Day
Cold peel is your friend for stretchy fabrics like spandex blends, for very detailed designs with fine lines, and for garments that can't handle the heat of immediate handling. It's also more forgiving if your press temperature is slightly off. The downside is the wait time, which can be a bottleneck in production. To mitigate this, you can use multiple platens or a cooling rack to let garments cool while you press the next one. Cold peel also reduces the risk of the film wrinkling during removal, which can cause print defects.
Technique: How to Peel Without Damaging the Print
Peeling is not just about grabbing a corner and yanking. The angle and speed of your peel matter. Always peel in a smooth, continuous motion, ideally at a 180-degree angle (back over itself) or a 45-degree angle. Peeling too fast can stretch the adhesive and cause distortion. Peeling too slow can allow the adhesive to cool and stick to the film. Use your free hand to hold the garment down; this prevents the fabric from lifting and separating from the print. For large designs, peel from one corner to the opposite corner, keeping the film close to the fabric as you go. If you feel resistance, stop and check the temperature; don't force it.
Common Peel Mistakes and How to Fix Them
Even experienced operators make mistakes. Here are a few common ones and their solutions:
- Peeling too early: The print looks glossy and feels sticky. Solution: wait a few seconds and try again, or adjust your press timing.
- Peeling too late: The film feels stuck and the print appears cloudy. Solution: re-press for a few seconds to warm the adhesive, then peel immediately.
- Peeling at an angle: The print distorts or tears. Solution: peel straight back over itself, keeping the film parallel to the fabric.
- Not holding the garment: The fabric lifts and the print stretches. Solution: use your free hand to anchor the garment.
If you find that your prints are consistently failing at the peel stage, it may be a sign of deeper issues with your press settings or materials. For more troubleshooting, you can find resources and supplies at dtf transfers.
The Peel and Print Durability: What to Expect
A proper peel sets the stage for durability. When the adhesive bonds correctly, the print will withstand multiple washes without cracking or fading. However, the peel alone doesn't guarantee longevity; fabric type, wash care, and ink quality also play roles. After peeling, inspect the print for any areas where the adhesive didn't transfer. These will appear as dull or missing spots. If you see them, you can often re-press the film for a few seconds and peel again, but only if the film is still warm. Once the film is removed, you can't reapply it. For this reason, it's better to over-press slightly than under-press, as long as you don't scorch the fabric.
Testing Your Peel for Quality
After peeling, perform a quick quality check: stretch the print gently. It should stretch with the fabric without cracking. If it cracks, the adhesive may not have fully penetrated. Rub the print with your thumb; it should feel smooth and not tacky. If it's tacky, the adhesive didn't set properly. Finally, wash a sample garment after 24 hours to ensure the print holds up. These simple tests can save you from delivering subpar products.
Frequently Asked Questions About DTF Peeling
Can I re-press a DTF transfer after peeling if it didn't stick?
Once the film is removed, you cannot reapply it. However, if you notice missing spots immediately after peeling, you can place the film back over the print and re-press for a few seconds while it's still warm. This may help transfer additional adhesive. If the film has cooled, it's best to start with a new transfer.
Why does my DTF transfer peel off in the wash?
Peeling in the wash usually indicates insufficient adhesion during the press. This could be due to low pressure, incorrect temperature, or peeling too late (cold peel when hot peel is required). Ensure your press settings are correct and that you're peeling at the right time. Also, check that the fabric is compatible with DTF; some coatings repel adhesive.
How do I know if my DTF film is hot peel or cold peel?
Check the manufacturer's specifications. Most films are labeled as hot peel or cold peel. If you're unsure, test a small piece: press it according to standard settings and try peeling immediately. If it releases easily, it's likely hot peel. If it resists, wait until it cools and try again; if it then peels easily, it's cold peel.
What causes the print to look cloudy after peeling?
A cloudy appearance often means the adhesive didn't fully melt or bond. This can happen if the press temperature is too low, pressure is uneven, or you peeled too late. Try increasing the temperature slightly or ensuring even pressure. Also, make sure the film is completely dry before pressing; moisture can cause cloudiness.
Can I use a household iron to apply DTF transfers?
While possible, it's not recommended. Household irons don't provide consistent temperature and pressure, which are critical for DTF. The peel stage is especially tricky because you can't control the cooling rate. For reliable results, use a heat press. If you must use an iron, test on a scrap garment first and be prepared for inconsistent outcomes.
Mastering the peel is a small but critical step in the DTF process. With practice and attention to detail, you'll be able to produce prints that look great and last. Remember, the peel is not an afterthought; it's the final handshake between your design and the garment. Treat it with care, and your customers will notice the difference.