
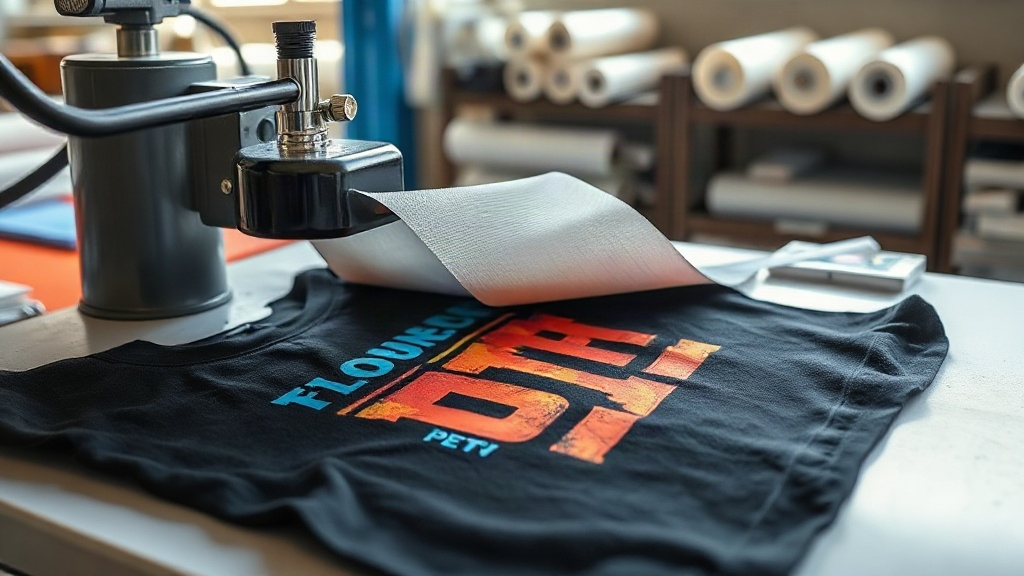
When I first heard about DTF Transfers, I was skeptical. Could a transfer really bond to cotton, polyester, and blends without the hassle of weeding or special pretreatments? After months of testing, I can confidently say yes. DTF, or Direct to Film, has become my go-to method for creating vibrant, durable prints on everything from t-shirts to tote bags. In this guide, I'll walk you through the entire process, share my hard-earned lessons, and help you avoid common pitfalls. Whether you're a hobbyist or a small business owner, mastering DTF Transfers can elevate your game.
What Are DTF Transfers?
DTF stands for Direct to Film. It's a printing technology where your design is printed onto a special PET film using a DTF printer. The printer lays down a layer of white ink, followed by CMYK colors, and then a powdered hot-melt adhesive is applied to the wet ink. Once the powder is cured, you have a transfer ready to be heat-pressed onto fabric. Unlike DTG (Direct to Garment), which prints directly onto the shirt, DTF transfers are printed separately and then applied. This separation offers flexibility: you can print a batch of transfers and press them as needed, which is great for inventory management.
Why Choose DTF Transfers Over Other Methods?
There are several reasons why DTF has gained popularity. First, it works on a wide range of fabrics, including 100% cotton, polyester, blends, and even leather. Second, the prints are highly detailed and stretchable, making them ideal for performance wear. Third, DTF transfers don't require weeding like vinyl, saving time on intricate designs. Fourth, the color vibrancy is impressive, especially on dark garments, because the white ink layer provides a solid base. Finally, DTF transfers are durable; with proper care, they can outlast the garment itself.
The DTF Transfer Process Step by Step
Understanding the workflow helps you troubleshoot issues. Here's how it goes:
- Design Preparation: Create your artwork in a graphics program. Ensure it's mirrored if your printer requires it (most DTF printers print mirrored by default). Use CMYK color mode for accurate colors.
- Printing: Load the DTF film into your printer. The printer prints the white ink layer first, then the color layers on top. Some printers have a separate white ink channel; others use a single printhead. Follow your printer's settings for ink limits and resolution.
- Powdering: While the ink is still wet, apply hot-melt adhesive powder evenly over the print. Shake off excess powder. You can use a powder shaker machine for consistency.
- Curing: Place the film in a curing oven or under a heat press (without pressure) to melt the powder. The powder should turn glossy and gel-like. This step is crucial; undercuring leads to poor adhesion.
- Pressing: Set your heat press to the recommended temperature (usually 300-320°F) and pressure (medium to firm). Place the transfer on the garment, cover with a Teflon sheet or parchment paper, and press for 10-15 seconds. Peel the film either hot or cold, depending on the film type.
Choosing the Right DTF Supplies
Not all DTF films and powders are created equal. I've tested several brands, and the differences are noticeable. Here's what to look for:
- Film: Look for double-sided matte PET film. It should be coated to hold ink and release cleanly. Thickness matters; thinner films conform better to fabric textures.
- Ink: Use DTF-specific inks, not regular DTG or sublimation inks. They have different viscosity and curing properties.
- Powder: Thermoplastic polyurethane (TPU) powder is standard. Particle size affects feel; finer powder gives a softer hand.
- Equipment: A dedicated DTF printer, a powder shaker, and a curing oven are ideal, but you can start with a converted printer and a heat press.
Common DTF Problems and How to Fix Them
Even with experience, issues pop up. Here are solutions to frequent headaches:
1. Cracking or Peeling After Wash
This usually means undercuring or insufficient pressure. Increase curing time or temperature, and ensure your heat press applies even pressure. Also, check that the powder is fully melted.
2. Dull Colors or Poor Opacity
If colors look washed out, you might not be using enough white ink. Increase white ink density in your printer settings. Also, ensure you're printing on the correct side of the film.
3. Powder Sticking to Unwanted Areas
Excess powder can cling to the film backing. Use a soft brush to remove it before curing. A powder shaker with a vacuum helps.
4. Film Not Peeling Cleanly
This can happen if the transfer is too hot or too cold. Experiment with hot peel vs. cold peel films. Hot peel films are peeled immediately after pressing; cold peel films must cool completely.
Tips for Vibrant, Long-Lasting DTF Transfers
After countless trials, I've picked up a few tricks that make a big difference:
- Pre-press your garment: This removes moisture and wrinkles, ensuring a smooth surface.
- Use a Teflon sheet: It protects the transfer and distributes heat evenly.
- Adjust pressure: Too little pressure and the transfer won't adhere; too much and the ink can spread. Medium-firm is usually right.
- Test your settings: Every heat press is different. Use a temperature gun to verify actual platen temperature.
- Wash inside out: Turn garments inside out and wash in cold water. Avoid fabric softener and tumble dry low.
DTF Transfers vs. Other Printing Methods
How does DTF stack up against DTG, screen printing, and vinyl? Here's a quick comparison:
- DTG: Best for 100% cotton, but requires pretreatment and can be less durable on synthetics. DTF works on more fabrics and often has better stretch.
- Screen Printing: Cost-effective for large orders, but setup is time-consuming and not ideal for full-color or photographic designs. DTF excels at detailed, multi-color prints without setup fees.
- Vinyl: Great for simple text and shapes, but weeding is tedious and layered vinyl can be thick. DTF offers a smoother, more integrated feel.
Frequently Asked Questions About DTF Transfers
How long do DTF transfers last?
With proper application and care, DTF transfers can last 50+ washes. They may outlast the garment itself. Avoid high heat when washing and drying to maximize longevity.
Can I use DTF transfers on dark colors?
Absolutely. DTF transfers include a white ink base, so they show up vibrantly on dark fabrics. This is one of their biggest advantages over DTG, which may require a white underbase.
Do I need a special printer for DTF?
You can convert an Epson printer with DTF inks and a RIP software, but dedicated DTF printers are more reliable. They handle white ink circulation and produce consistent results.
What fabrics work best with DTF transfers?
DTF works on cotton, polyester, blends, leather, and more. It's not recommended for nylon or fabrics with heavy coatings, as adhesion may fail.
Is DTF transfers cost-effective for small batches?
Yes. Unlike screen printing, there are no minimums or setup fees. You can print one transfer or hundreds, making it ideal for small businesses and personalization.
Mastering DTF Transfers takes practice, but the payoff is huge: vibrant, durable prints on almost any fabric, with minimal fuss. I hope this guide helps you avoid my early mistakes and jumpstart your DTF journey. If you have questions, feel free to reach out. Happy pressing!