
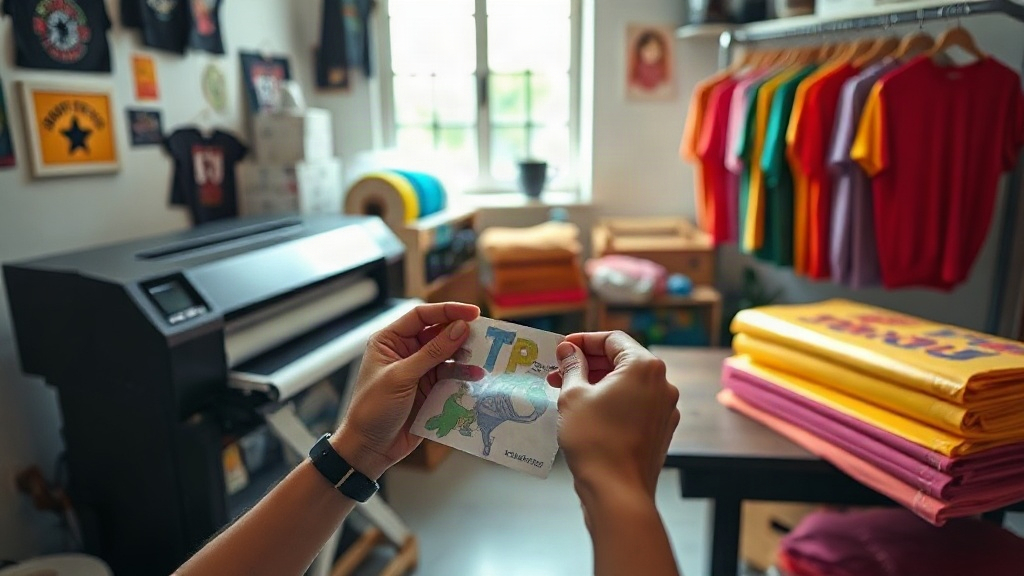
When I first heard about DTF printing, I was skeptical. As someone who had spent years wrestling with vinyl cutters and screen printing, the idea of a digital transfer that could handle full-color designs on any fabric seemed too good to be true. But after testing it in my garage shop, I became a believer. DTF, or Direct to Film, is a game-changer for small business owners and hobbyists alike. In this guide, I'll walk you through everything you need to know to get started, from choosing the right film to troubleshooting common issues. Let's dive in.
What Exactly Is DTF Printing?
At its core, DTF printing is a digital printing method where your design is printed onto a special film, coated with a hot-melt adhesive powder, and then heat-pressed onto fabric. Unlike DTG (Direct to Garment), which prints directly onto the shirt, DTF uses a transfer, so you can print on a wide range of materials, including cotton, polyester, blends, and even leather. The process involves a few key steps: printing, powdering, curing, and pressing. Each step has its nuances, but once you get the hang of it, you can produce vibrant, durable transfers right from your home or shop.
Why Choose DTF Over Other Methods?
If you're like me, you've probably tried other decoration methods. Here's why DTF stands out:
- No weeding required: Unlike heat transfer vinyl, you don't have to cut and weed tiny details. The printer does the work.
- Works on multiple fabrics: Cotton, polyester, blends, and even treated leather. No need to switch methods for different garments.
- Full-color capabilities: Photorealistic designs, gradients, and fine details are all possible without color limitations.
- Durability: When applied correctly, DTF transfers can withstand dozens of washes without fading or cracking.
Of course, it's not perfect for every situation. For large orders, screen printing might be more cost-effective. But for small batches and custom work, DTF is hard to beat.
Getting Started: The Essential Equipment
Printer and Ink
You'll need a printer that uses DTF ink, which is typically a pigment-based ink. Many people convert Epson printers, like the Epson L1800 or P800, with DTF ink systems. Alternatively, you can buy a dedicated DTF printer. The key is to use a printer with a good print head and the ability to handle white ink, as white is crucial for underbase on dark fabrics.
DTF Film
Not all films are created equal. You'll want a film that is coated for DTF printing. It usually comes in sheets or rolls. I recommend starting with sheets if you're a beginner, as they're easier to handle. Look for film that is compatible with your printer and has a good release layer.
Adhesive Powder
The powder is what makes the transfer stick to the fabric. There are two main types: TPU (thermoplastic polyurethane) and polyamide. TPU is more flexible and durable, while polyamide is softer but less stretchy. I prefer TPU for its versatility. You'll also need a powder shaker or a way to apply the powder evenly.
Heat Press
A heat press is essential. You can use a clamshell or swing-away press. Make sure it can reach temperatures around 325°F (160°C) and has consistent pressure. A good heat press will make your life much easier.
Curing Oven or Heat Gun
After powdering, you need to melt the powder. You can use a curing oven (like a toaster oven dedicated to this purpose) or a heat gun. I started with a heat gun, but it's tricky to get even melting. A small oven gives more consistent results.
Step-by-Step DTF Printing Process
1. Prepare Your Design
Create your design in your favorite graphics software. Remember to mirror the image horizontally before printing, as you'll be pressing it face down. Also, ensure your design has a transparent background if you want to print on dark shirts; the white underbase will be generated automatically by the RIP software.
2. Print on Film
Load your DTF film into the printer. Set your printer to the appropriate settings for DTF film. Print your design. The printer will lay down color and then white ink. If you're using a converted printer, you may need to manually switch between color and white ink, but dedicated DTF printers handle this automatically.
3. Apply Powder
While the ink is still wet, sprinkle the adhesive powder over the printed area. You can use a shaker bottle or a dedicated powder applicator. Make sure the entire design is covered, then shake off the excess. You can reuse the excess powder if it's clean.
4. Cure the Powder
Place the film in a curing oven at around 320°F (160°C) for about 2-3 minutes, or until the powder melts and becomes glossy. Alternatively, use a heat gun, keeping it moving to avoid scorching. The powder should turn from a matte white to a shiny, slightly translucent layer. This step is crucial for durability.
5. Press onto Fabric
Set your heat press to 325°F (160°C) with medium pressure. Pre-press the garment for a few seconds to remove moisture. Place the transfer face down on the fabric. Press for 15-20 seconds. Let it cool completely before peeling off the film. For a softer feel, you can press again for a few seconds after peeling.
Common DTF Problems and How to Fix Them
Even with experience, you'll run into issues. Here are some common ones and their solutions:
- Transfer not sticking: Usually due to insufficient pressure, temperature, or time. Increase one variable at a time until it adheres.
- Cracking after wash: Often caused by undercuring the powder. Make sure the powder is fully melted. Also, check that you're using the right powder for your fabric.
- Faded colors: Could be from too much heat during pressing, which scorches the ink. Lower the temperature or reduce pressing time.
- Film jamming in printer: Ensure you're using the correct film and that your printer's rollers are clean. Adjust the platen gap if necessary.
Tips for Better DTF Results
Here are some hard-earned tips that can save you time and frustration:
- Test, test, test: Always do a small test print before a big order. Fabrics vary, and what works on one shirt may not work on another.
- Keep it clean: Dust and lint are enemies of DTF. Keep your workspace clean and store film in a dust-free container.
- Use quality supplies: Cheap film or powder can lead to poor results. Invest in reputable brands.
- Calibrate your heat press: Use a heat gun or infrared thermometer to verify the actual temperature of your press. Many presses are off by 10-20 degrees.
- Store transfers properly: If you're not using them immediately, store them in a cool, dry place away from direct sunlight.
Frequently Asked Questions
Can I use DTF on 100% polyester?
Yes, DTF works great on polyester. However, polyester is sensitive to heat, so you may need to lower the press temperature to around 300°F (150°C) and reduce pressing time to avoid scorching or dye migration. Always test first.
How long do DTF transfers last?
With proper application and care, DTF transfers can last 50+ washes. To extend longevity, wash inside out in cold water and avoid harsh detergents or fabric softeners. Tumble dry low or hang dry.
Do I need a special printer for DTF?
You can convert a standard inkjet printer (like certain Epson models) with DTF ink and a RIP software, or buy a dedicated DTF printer. Dedicated printers are more expensive but simpler to use. If you're just starting, a converted printer can be a cost-effective option.
What is the difference between DTF and DTG?
DTF prints onto a film and then transfers to the fabric, while DTG prints directly onto the garment. DTF works on more fabric types and doesn't require pre-treatment, but DTG can be more cost-effective for large runs on cotton. DTF also allows for more vibrant colors on dark shirts without a white underbase.
How do I remove a DTF transfer if I make a mistake?
If you catch it immediately after pressing, you can try peeling it off while hot. If it's already cooled, you can use a heat gun to warm it up and peel it off. Be careful not to scorch the fabric. Sometimes a little adhesive residue remains; you can clean it with a bit of alcohol.