If you're exploring custom printing options, you've likely come across DTF transfers. This technology has revolutionized the apparel industry, offering a flexible and cost-effective way to produce high-quality designs. Whether you're a small business owner, a hobbyist, or simply curious about the process, understanding DTF is essential. In this guide, we'll walk you through everything from the basics to advanced tips, ensuring you have the knowledge to make informed decisions.
What Are DTF Transfers?
DTF stands for Direct to Film. Unlike traditional methods like screen printing or heat transfer vinyl, DTF involves printing your design onto a special PET film using a DTF printer. The printed film is then covered with an adhesive powder, which is melted during the heat press process. This results in a vibrant, durable transfer that can be applied to a wide range of fabrics, including cotton, polyester, and blends. The beauty of DTF transfers lies in their versatility; they work on light and dark colors alike, and they don't require weeding or complex setup.
How DTF Transfers Work: Step-by-Step
Understanding the process helps you appreciate why DTF has become so popular. Here's a simplified breakdown:
- Design Creation: You create or upload your artwork using graphic design software. Make sure it's in high resolution and includes any necessary color separations.
- Printing: A DTF printer prints the design onto a roll of PET film. The printer uses specialized DTF inks that bond well with the film and the adhesive powder.
- Adhesive Application: While the ink is still wet, an adhesive powder is applied to the printed side. The powder is then partially cured, often using a heat source, to fix it in place.
- Heat Press Transfer: The film is placed adhesive-side down onto the garment. A heat press applies pressure and temperature (typically around 160°C for 15-20 seconds) to melt the adhesive and bond the design to the fabric.
- Peeling: After pressing, you peel away the film, leaving the design permanently transferred. For some films, you might need to use a cold peel, while others allow hot peeling.
This process is efficient and allows for on-demand production, which is perfect for custom orders.
Benefits of Using DTF Transfers
Why choose DTF over other methods? Here are some compelling advantages:
- Versatility: DTF works on almost any fabric, including tricky materials like nylon and blends that are problematic for other methods.
- No Weeding: Unlike vinyl, DTF doesn't require manual weeding, saving you time and effort, especially for intricate designs.
- Vibrant Colors: The inks are highly opaque, ensuring bright colors even on dark garments. You can achieve photorealistic prints with gradients and details.
- Durability: DTF transfers are known for their excellent stretchability and wash resistance, making them ideal for apparel that gets frequent use.
- Cost-Effective: For small to medium runs, DTF is often more affordable than screen printing because there's no setup cost. You can print one-off designs without breaking the bank.
- Soft Hand Feel: The transfers are thin and flexible, resulting in a soft texture that doesn't crack or peel easily.
DTF Transfers vs. Other Printing Methods
To make an informed decision, it's helpful to compare DTF with alternatives like screen printing, sublimation, and vinyl.
DTF vs. Screen Printing
Screen printing is excellent for large quantities of simple designs, offering low per-unit costs. However, it requires significant setup and is impractical for small orders. DTF shines in flexibility and ease of use, with no setup costs, but the per-unit cost is higher. For runs under 50 pieces, DTF is often more economical.
DTF vs. Sublimation
Sublimation works only on polyester or light-colored materials because the ink turns into gas and bonds with the fabric. DTF, on the other hand, can print on any fabric, including cotton. If you want to print on cotton t-shirts, DTF is your best bet.
DTF vs. Heat Transfer Vinyl
Vinyl is great for simple shapes and text but requires cutting and weeding, which is labor-intensive. DTF eliminates these steps and allows full-color prints without extra layers. For detailed logos or photos, DTF is superior.
Essential Equipment and Materials
To start using DTF transfers, you need specific tools. Here's a checklist:
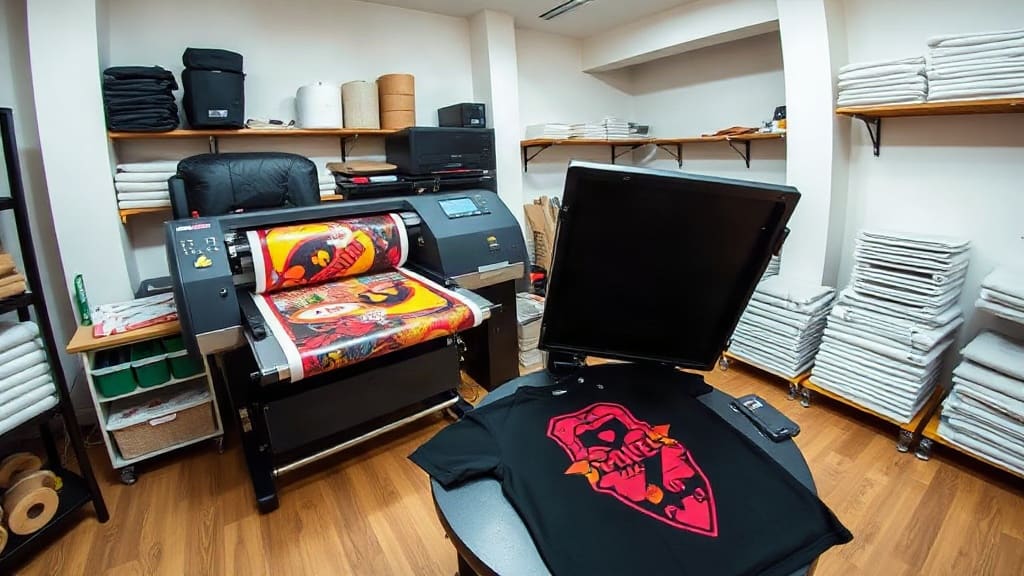
- DTF Printer: You can convert a standard inkjet printer to use DTF inks, but dedicated DTF printers are more reliable. They often come with features like white ink circulation to prevent clogging.
- PET Film: This is the medium onto which you print. Choose high-quality film to ensure proper adhesion.
- DTF Inks: These include CMYK plus white, which is essential for creating an opaque base on dark garments.
- Adhesive Powder: This special powder melts during pressing, acting as a glue between the design and the fabric.
- Heat Press: A standard heat press works, but you need precise temperature and pressure control.
- Curing Oven or Laminator: This is used to melt the adhesive powder after application.
Many suppliers offer starter kits that include everything you need, which is a great way to begin.
Tips for High-Quality DTF Transfers
Getting the best results requires attention to detail. Here are some expert tips:
- Use High-Resolution Images: Ensure your design is at least 300 DPI to avoid pixelation.
- Adjust White Ink Settings: White ink is crucial for dark fabrics. Calibrate your printer to lay down the right amount; too much can cause cracking, too little may not be opaque.
- Proper Adhesive Powder Application: The powder should cover the entire printed area evenly. Excess powder can cause a hard hand feel, while insufficient powder leads to poor adhesion.
- Heat Press Settings: Always follow the film manufacturer's recommendations. Typically, it's around 300°F (150°C) for 15 seconds with medium pressure. Test on a sample fabric first.
- Peel Secrets: Hot peeling gives a matte finish, while cold peeling results in a glossy look. Experiment to see which you prefer.
- Pre-Press Garments: Pre-pressing your garment for a few seconds removes moisture and wrinkles, ensuring a smoother transfer.
Applications of DTF Transfers
The versatility of DTF makes it suitable for a wide range of products:
- Apparel: T-shirts, hoodies, sweatshirts, and even socks.
- Accessories: Tote bags, hats, and aprons.
- Home Textiles: Pillows, blankets, and towels.
- Custom Merch: Great for small businesses, sports teams, and events.
Because you can print on demand, DTF is perfect for businesses that offer personalized items without maintaining large inventories.
Cost Considerations and ROI
Investing in DTF involves upfront costs for equipment and materials. A basic setup might cost between $2,000 and $5,000, but prices vary. However, the low cost per print and the ability to sell custom products at a premium can quickly recoup your investment. Many print-on-demand services use DTF due to its efficiency. If you're just starting, you might consider outsourcing your prints to a DTF supplier until you're confident in your order volume.
When calculating costs, factor in the price of film, ink, powder, and electricity. On average, a single DTF transfer might cost you around $0.50 to $1.00 for a 12x12 inch design, depending on your volume and supplier prices.
Common Mistakes to Avoid
Even experienced printers can make errors. Here are pitfalls to sidestep:
- Ignoring Fabric Compatibility: While DTF works on many fabrics, some coatings or treatments might affect adhesion. Always test.
- Poor Ventilation: DTF inks and powders can emit fumes. Ensure your workspace is well-ventilated.
- Skipping Test Prints: Always do a test run to check colors and adhesion before a full production run.
- Incorrect Storage: Store your film and transfers in a cool, dry place to prevent moisture damage.
- Overlooking White Ink Maintenance: White ink tends to settle and clog. Use a good maintenance system to keep your printer in top condition.
Frequently Asked Questions
Is DTF transfer suitable for dark shirts?
Yes, DTF is excellent for dark fabrics because the white ink layer creates an opaque base, ensuring the design colors pop. Many other methods struggle with dark materials, but DTF handles them effortlessly.
How many washes can a DTF transfer withstand?
With proper application and care, DTF transfers can last 50 or more washes without significant fading or cracking. To maximize durability, wash garments inside out in cold water and avoid using bleach.
Can I use DTF transfers on polyester?
Absolutely. DTF works on polyester, cotton, blends, and even nylon. However, for 100% polyester, you might want to use a lower heat setting to prevent scorching. Always test with a small piece first.
What is the difference between hot and cold peel?
Hot peel involves removing the film immediately after pressing, which gives the transfer a matte finish. Cold peel means waiting until the transfer cools down, which results in a glossy appearance. Some films are designed for either method, so always follow the instructions.
How do I remove adhesive powder residue?
If you notice excess powder after pressing, it might be due to over-application. To prevent this, ensure you shake off the powder thoroughly before curing. If residue remains, you can gently re-press with a Teflon sheet to melt it away.
Final Thoughts
DTF transfers offer a fantastic opportunity for anyone in the custom printing industry. They combine ease of use with professional results, making them a favorite among small business owners and crafters. By understanding the process, investing in quality materials, and honing your technique, you can produce stunning, durable custom apparel that will impress your customers. Whether you're just starting or looking to expand your services, DTF is a valuable addition to your arsenal.