If you're looking for a versatile and efficient way to create custom apparel, dtf transfers might be exactly what you need. This printing method has taken the industry by storm, offering a fantastic alternative to traditional screen printing and heat transfer vinyl. Unlike other methods that require expensive equipment or complex setups, DTF transfers allow you to produce vibrant, durable designs on a wide range of fabrics, all from the comfort of your home or small business.
In this comprehensive guide, we'll dive deep into what DTF transfers are, how they work, the benefits they offer, and how you can get the best results every time. Whether you're a seasoned pro or just starting, there's something here for you.
What Are DTF Transfers?
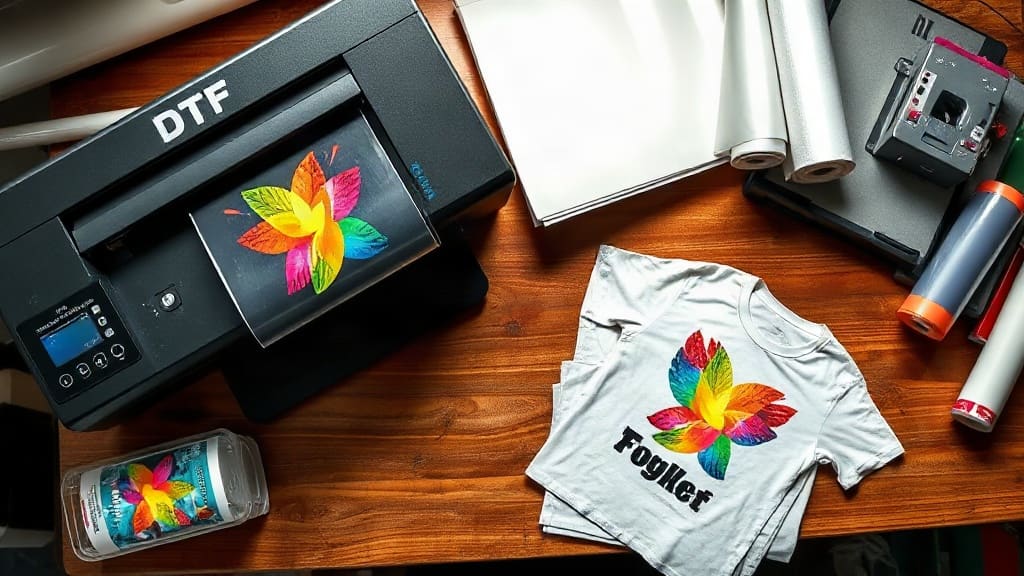
DTF stands for Direct to Film. It's a printing method where a design is printed onto a special PET film using a DTF printer and specialized inks. The printed film is then coated with a hot-melt adhesive powder, which is melted and cured. To apply the transfer, you simply cut out the design, place it on your garment, and press it with a heat press. The adhesive bonds the design to the fabric, resulting in a soft, stretchy, and highly detailed print.
How DTF Transfers Work: A Step-by-Step Overview
Understanding the process can help you appreciate the technology and troubleshoot issues if they arise. Here's a simplified breakdown:
- Design Creation: Your artwork is prepared using graphic design software. It's essential to use high-resolution images and convert any text to outlines to avoid font issues.
- Printing: The design is printed onto a special PET film using a DTF printer. The printer uses white ink to create a white base layer under the actual colors, which is crucial for printing on dark garments.
- Adhesive Powder Application: While the ink is still wet, a hot-melt adhesive powder is applied over the film. This powder is what will bond the design to the fabric.
- Drying or Curing: The film passes through a dryer or is heated to melt the adhesive powder, creating a solid adhesive layer.
- Cutting: Once cooled, the film is cut to the shape of the design, removing any excess film.
- Heat Pressing: The transfer is placed on the garment with the adhesive side down. A heat press applies pressure and heat, typically around 320°F (160°C) for 15-20 seconds, causing the adhesive to melt and bond with the fabric.
- Peeling: After pressing, the film is peeled away, leaving your design on the garment.
Key Benefits of DTF Transfers
Why have DTF transfers become so popular? Let's look at some of the standout advantages:
- Versatility: DTF works on a wide range of fabrics, including cotton, polyester, blends, and even leather and nylon. This makes it a go-to choice for many custom printing jobs.
- No Weeding Required: Unlike vinyl, there's no tedious weeding of excess material. The entire design is cut out as a single piece, saving you time and effort.
- Soft Hand Feel: The adhesive layer is thin and flexible, resulting in prints that are soft to the touch and don't crack easily.
- Vibrant Colors: The white ink base ensures that colors pop, even on black or dark fabrics. You get excellent color accuracy and detail.
- Cost-Effective for Small Runs: Since there are no screen setup costs, DTF is perfect for single items or small batches. You can even print on-demand.
- Ease of Use: With minimal training, you can start producing high-quality transfers. The process is straightforward, and there are plenty of resources to help you.
DTF Transfers vs. Other Printing Methods
To fully understand the value of dtf transfers, it helps to compare them with other popular methods.
DTF vs. Screen Printing
Screen printing has been the industry standard for decades, especially for large orders. However, it requires significant setup, including creating screens for each color. DTF transfers are much more flexible for small to medium runs, and they offer a softer hand feel compared to traditional screen prints. For multi-color designs, DTF is often more practical because you don't need to align multiple screens.
DTF vs. Heat Transfer Vinyl (HTV)
HTV is great for simple designs and works by cutting vinyl into shapes and pressing them onto garments. However, HTV requires weeding, and it's not suitable for highly detailed or photorealistic designs. DTF transfers can handle complex graphics with gradients and shadows, and they don't require weeding. The finished product is also more flexible and breathable than HTV.
DTF vs. Sublimation
Sublimation printing bakes dye into the fabric, but it only works on polyester or polymer-coated surfaces. DTF transfers work on a wider range of materials, including cotton. Sublimation produces vivid colors on white or light-colored substrates, but DTF gives you the ability to print on dark colors without extra steps.
Tips for Getting the Best Results with DTF Transfers
Even though DTF is relatively straightforward, there are a few tricks to ensure your transfers come out perfectly every time.
1. Start with High-Quality Artwork
The quality of your design directly impacts the final print. Use vector files whenever possible, or high-resolution PNGs with transparent backgrounds. Remember to account for a white ink layer if you're printing on dark garments. Your design software should allow you to separate the white base from the color layer.
2. Choose the Right Film and Powder
Not all films and powders are created equal. Make sure to use a PET film specifically designed for DTF printing. The adhesive powder should be of fine quality and match your ink type. Some powders are designed for high stretch fabrics, so consider the end use of your garment.
3. Calibrate Your Printer
DTF printers require specific settings for ink density and head height. Take the time to calibrate your printer according to the manufacturer's recommendations. This will prevent issues like banding or poor adhesion.
4. Use the Right Heat Press Settings
Temperature, pressure, and time are critical. As a general rule, 320°F (160°C) for 15 seconds with medium to firm pressure works well for most fabrics. However, always test on a scrap piece of fabric first. Too much heat can cause the adhesive to over-melt and bleed, while too little heat will result in poor adhesion.
5. Press with Even Pressure
Make sure your heat press is level and apply even pressure. Some pressers have adjustable pressure knobs; find the sweet spot that gives you a firm press without damaging the fabric or the transfer.
6. Handle the Film Carefully
The film is delicate, especially after printing and powder application. Handle it gently to avoid smudging the ink or dislodging the powder. When peeling, do it while the transfer is still warm, but not hot, to prevent sticking or stretching.
Common Mistakes and How to Avoid Them
Even experienced printers can run into problems. Here are some common issues and solutions:
- Poor Adhesion: If the transfer peels off after washing, it's likely due to insufficient heat or pressure, or using the wrong powder. Double-check your settings and ensure you're using a compatible powder.
- Ink Bleeding: This happens when the ink spreads beyond the intended area. It can be caused by over-saturating the film or using too much heat during the drying process. Adjust your ink density and drying temperature.
- White Ink Not Opaque Enough: If you see the garment color through the design, you may need to increase the white ink layer or print multiple passes. Some printers allow you to adjust white ink density.
- Cracking After a Few Washes: This is often a sign of using low-quality materials or not pressing correctly. Ensure you're using high-quality film, powder, and proper pressing techniques.
Frequently Asked Questions about DTF Transfers
How many washes can a DTF transfer last?
With proper application and care, dtf transfers can last for many washes, often 50 or more. The key is to use quality materials and follow the recommended heat press instructions. After pressing, it's advisable to wait at least 24 hours before washing the garment to allow the adhesive to fully cure.
Can I use DTF transfers on any type of fabric?
DTF transfers are versatile and can be used on cotton, polyester, blends, and even some synthetic materials like nylon. However, for best results, especially with stretchy fabrics, choose a powder that is specifically designed for stretch applications. Always test on a small area first.
Is it better to buy pre-made DTF transfers or print them myself?
It depends on your needs. If you're just starting or have occasional orders, buying pre-made transfers from a reputable supplier can save you the initial investment in a DTF printer. However, if you print regularly, having your own printer gives you more control, faster turnaround, and potentially lower costs in the long run.
What equipment do I need to make DTF transfers at home?
You'll need a DTF printer (or a compatible inkjet printer that can be converted), PET film, DTF inks (including white), adhesive powder, a heat source for curing (like a dryer or heat press), and a heat press for application. Some people use a regular inkjet printer if they add a white ink cartridge and use a powder applicator, but a dedicated DTF printer is more reliable.
How do I care for garments with DTF transfers?
To prolong the life of your DTF prints, wash garments inside out in cold water, avoid using bleach or fabric softeners, and air dry or tumble dry on low. Do not iron directly on the print. With proper care, DTF transfers can maintain their appearance for a long time.
As you can see, dtf transfers offer a world of possibilities for custom printing. They are an excellent investment for small businesses, hobbyists, and even large-scale operations looking to streamline their process. By following the tips in this guide, you'll be well on your way to creating stunning, durable apparel that your customers will love.